Usb Led Strips have revolutionized the way we approach lighting, transforming mundane spaces into vibrant, dynamic environments with remarkable ease. As a leading expert in LED lighting with over a decade of hands-on experience in design, installation, and repair, I’ve seen firsthand how these clever little strips can make a huge impact. Whether you’re looking to add a subtle backlight to your TV, create an immersive gaming setup, or infuse your home with personalized ambiance, understanding the ins and outs of a USB LED strip is your first step to unlocking its full potential.
These flexible, self-adhesive lighting solutions, powered conveniently by a standard 5V USB port, offer an accessible and energy-efficient way to bring a splash of color and illumination to virtually any area. Forget complicated wiring or expensive installations; USB LED strips are designed for plug-and-play simplicity, making them a favorite among DIY enthusiasts and interior design aficionados alike. From enhancing visual comfort to setting the perfect mood, let’s dive into everything you need to know about these versatile lighting powerhouses.
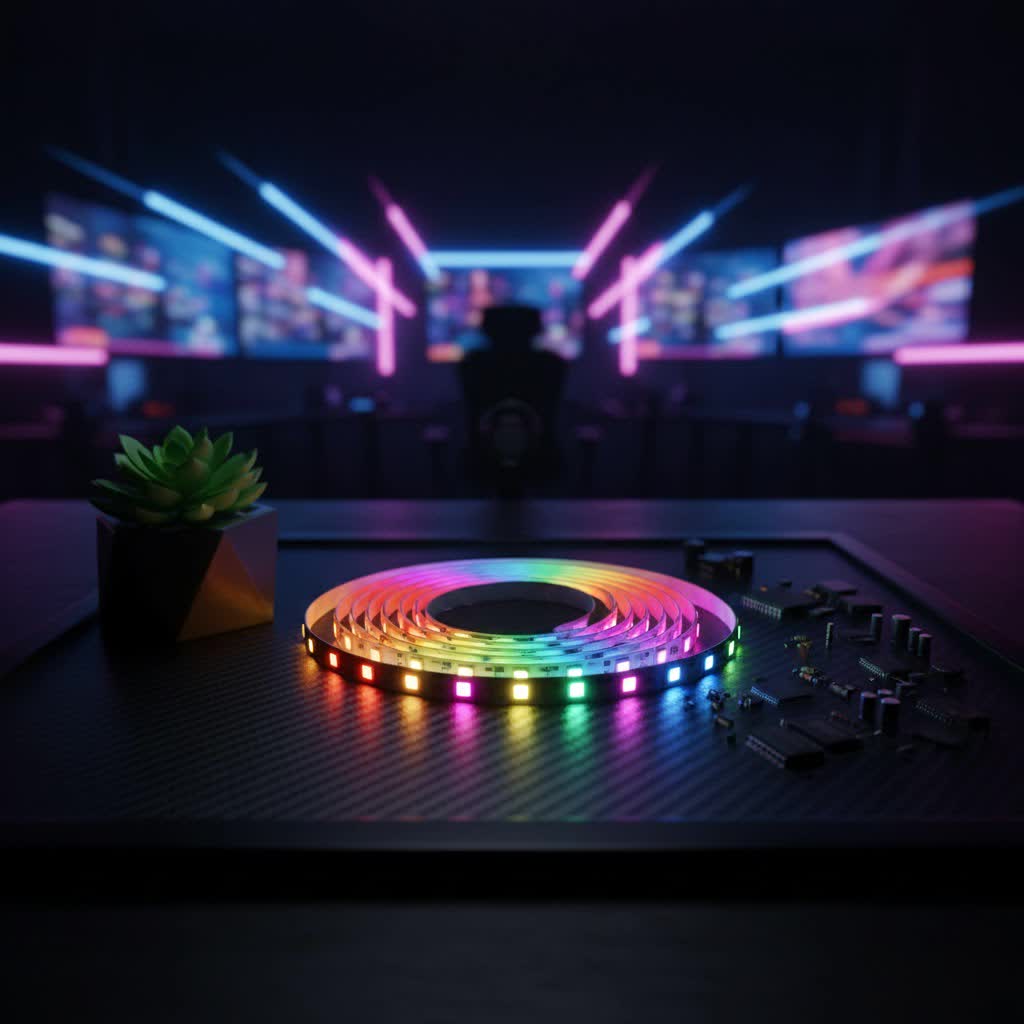
What Makes USB LED Strips Shine?
USB LED strips have quickly become a go-to choice for both practical and decorative lighting, thanks to a combination of features that set them apart from traditional lighting options. Their widespread appeal stems from their inherent simplicity and surprising functionality.
Simplicity & Accessibility
|
Our Picks for the Best LED Strip in 2026
As an Amazon Associate I earn from qualifying purchases.
|
||
| Num | Product | Action |
|---|---|---|
| 1 | Aclorol LED Strip Lights 5V USB 6.56FT/2M 640 LEDs Blue Indoor Rope Lights for Bedroom Not Waterproof IP20 CRI85+ Flexible LED Light for TV Backlight Living Room Party DIY Lighting |

|
| 2 | Tenmiro Led Lights for Bedroom 100ft (2 Rolls of 50ft) Music Sync Color Changing Strip Lights with Remote and App Control RGB Strip, for Room Home Party Decoration |
|
| 3 | Govee 100ft RGBIC LED Strip Lights, Smart LED Lights Work with Alexa and Google Assistant, LED Lights for Bedroom WiFi App Control Segmented DIY Multiple Colors, Color Changing Light, (2 x 50ft) |
|
| 4 | KSIPZE 100ft Led Strip Lights RGB Music Sync Color Changing Led Lights with Smart App Control Remote Led Lights for Bedroom Room Lighting Flexible Home Décor |
|
| 5 | Govee RGBIC LED Strip Lights, Smart LED Lights for Bedroom, Bluetooth LED Lights APP Control, DIY Multiple Colors on One Line, Color Changing LED Strip Lighting Music Sync, Home Decor, 16.4ft |
|
| 6 | Govee RGBIC LED Strip Lights, 32.8ft Smart LED Lights for Bedroom, Bluetooth LED Lights APP Control, DIY Multiple Colors on One Line, Color Changing LED Strip Lighting Music Sync, Home Decor |
|
| 7 | Govee Smart RGB LED Strip Lights for Bedroom, 32.8ft WiFi LED Light Strip Work with Alexa Google Assistant, 16 Million Colors with App Control and Music Sync Lights for Home Decor, 2 Rolls of 16.4ft |
|
| 8 | KANTUTOE LED Lights for TV, 16.4ft LED Lights for 45-75 Inch TVs, RGB TV Backlight Behind, Music Sync Bluetooth APP & Remote Control Strip Lights USB Powered for Bedroom, Gaming, Home Décor |
|
| 9 | Govee Warm White LED Strip Lights, Bright 300 LEDs, 3000K Dimmable Light Strip 16.4ft with Control Box, LED Lights for Bedroom, Kitchen Cabinets, Living Room, ETL Listed Adapter Included |
|
| 10 | VOEWT LED Neon Lights Daylight White 6000K,9.8ft 110-120V LED Strip Lights,Flexible Outdoor Waterproof Neon Rope Lights for Bedroom,Cabinet,Kitchen,Living Room,Mirror,Halloween Decor |
|
At their core, USB LED strips are designed for ultimate convenience. Powered by any standard 5V USB port—think your TV, computer, wall adapter, or even a portable power bank—they eliminate the need for complex electrical wiring. This “plug-and-play” nature means almost anyone can install them without special tools or expertise. Just plug it in, and you’re good to go!
Versatility in Design
The flexible nature of these strips allows them to conform to various surfaces and shapes, making them incredibly adaptable. Most come with an adhesive backing, usually a strong 3M tape, ensuring easy and secure attachment to almost any clean surface. They can be bent around corners, tucked into crevices, or run along edges, providing seamless illumination where traditional fixtures simply can’t.
Dynamic Lighting Effects
Modern USB LED strips offer a spectrum of lighting possibilities. Many are RGB (Red, Green, Blue), allowing you to choose from millions of colors, or even RGBIC, which enables multiple colors to be displayed simultaneously on a single strip for more dynamic effects. Beyond color, you can often adjust brightness, set custom scenes, or choose from pre-programmed modes like fading, strobing, or music synchronization.
Energy Efficiency
LED technology is inherently energy-efficient, and USB LED strips are no exception. They consume very little power compared to incandescent bulbs, meaning you can enjoy vibrant lighting without worrying about a soaring electricity bill. This low power draw also contributes to their minimal heat emission, making them safe for prolonged use in various environments.
Affordability
Compared to many other custom lighting solutions, USB LED strips are remarkably cost-effective. They offer a high return on investment in terms of aesthetic enhancement and functional benefits, making premium lighting accessible to a wider audience. It’s an affordable way to dramatically upgrade the look and feel of any space.
Beyond the Backlight: Creative Uses for USB LED Strips
While widely known for backlighting TVs and monitors, USB LED strips boast an impressive range of applications that can enhance nearly any area of your home or office. Let’s explore some popular and innovative ways to integrate these versatile lights into your life.
Elevate Your Entertainment
One of the most popular uses for a USB LED strip is creating bias lighting behind your television or computer monitor. This subtle glow reduces eye strain, especially in dark rooms, by decreasing the contrast between a bright screen and its dark surroundings. It also enhances the perceived contrast and color vibrancy on your screen, making your movies and shows pop.
Gaming Zone Upgrade
For gamers, a USB LED strip is almost a necessity. They can transform an ordinary gaming setup into an immersive battlestation. Line the back of your monitor, desk edges, or even your gaming PC tower to create dynamic, color-changing effects that react to your game or simply set the mood for intense play. Brands like Govee and Elgato offer sophisticated options for this purpose, often with app control for custom scenes.
Kitchen & Cabinet Illumination
Bring both functionality and flair to your kitchen with under-cabinet USB LED strips. They provide excellent task lighting for meal prep or act as stylish accent lighting to highlight your countertops and backsplash. Their slim profile makes them virtually invisible until they’re switched on.
Bedroom Ambiance
Create a tranquil or vibrant atmosphere in your bedroom. Install a USB LED strip under your bed for a floating effect, along crown molding for indirect lighting, or behind headboards for a soft, ambient glow. Tunable white options can help you shift from warm, relaxing tones to cool, invigorating light as needed.
Portable Adventures
Thanks to their USB power, these strips are fantastic for portable lighting solutions. Pair them with a power bank for camping, emergency lighting, or even decorating outdoor spaces for a party. Their flexibility and easy power source make them incredibly convenient for on-the-go illumination.
Subtle Accentuation
Beyond these common uses, USB LED strips are perfect for highlighting architectural features, artwork, or collectibles. Wrap them around mirrors, line floating shelves, or tuck them into display cases to draw attention and add a touch of modern elegance.
“The beauty of USB LED strips lies in their ability to democratize custom lighting,” notes Alex Thorne, a seasoned lighting designer. “You don’t need to be an electrician to create professional-looking accent lighting; you just need a vision and a USB port.”
Choosing Your Perfect USB LED Strip: Key Considerations
With so many options available, selecting the right USB LED strip might seem daunting. However, by focusing on a few key factors, you can easily find the perfect fit for your project.
Length & Flexibility
First, accurately measure the area you intend to illuminate. USB LED strips come in various lengths, typically from a few feet to several meters. Most strips are also designed to be cut at specific intervals, usually marked with a small scissor icon or copper pads, allowing for precise customization. Always cut only at these designated points to avoid damaging the circuit.
Brightness & Color
Consider the desired luminosity and color capabilities.
- Brightness: Measured in lumens, this indicates how bright the strip will be. For bias lighting, a softer glow is often preferred, while task lighting might require higher lumens.
- Color Options:
- RGB: Offers a wide spectrum of colors, but usually only one color can be displayed at a time along the entire strip.
- RGBIC (Individual Control): Advanced strips that allow multiple colors to be displayed simultaneously on different segments of the strip, creating more dynamic and intricate effects.
- Tunable White: If you primarily need white light, some strips offer adjustable color temperatures from warm (yellowish) to cool (bluish) white.
Control Methods
How you interact with your lights significantly impacts your experience.
- IR Remote: Simple, line-of-sight control with a handheld remote.
- Inline Controller: Small buttons directly on the USB cable for basic functions.
- Smartphone App (Bluetooth/Wi-Fi): Offers advanced features, custom scenes, timers, and greater control range. Many brands like Govee provide robust app experiences.
- Voice Assistants: Strips with Wi-Fi connectivity can often integrate with smart home ecosystems like Amazon Alexa or Google Assistant, allowing for voice control.
Durability & Safety
Look for quality components. A strong 3M adhesive backing ensures your strip stays put. If the strip will be exposed to moisture, choose one with an appropriate IP (Ingress Protection) rating, indicating its water resistance. Many reputable brands also adhere to safety standards like RoHS and CE. Sylvania strips, for example, are known for being waterproof and emitting minimal heat.
Smart Features
For the tech-savvy, consider strips that offer smart home integration. This allows you to synchronize your lighting with other smart devices, create automated routines, and control your lights remotely from anywhere.
DIY Installation: A Step-by-Step Guide
Installing a USB LED strip is incredibly straightforward, making it a perfect DIY project. Here’s how to get your new lights up and glowing in no time.
1. Gather Your Tools
You’ll need your USB LED strip kit (which typically includes the strip and a controller/remote), an alcohol wipe or rubbing alcohol, and a clean cloth. Optional tools include scissors, corner connectors, or mounting clips if your kit doesn’t provide them or if you have complex corners.
2. Prep Your Surface
This step is crucial for ensuring the adhesive backing sticks properly. Use an alcohol wipe or a cloth dampened with rubbing alcohol to thoroughly clean the surface where you plan to install the strip. This removes dust, grease, and grime that could prevent adhesion. Let the surface dry completely.
3. Measure & Customize
Lay out your LED strip to visualize the path. If your strip is too long, locate the designated cutting marks (usually indicated by a scissor icon or small copper pads) and carefully snip the strip with sharp scissors. Remember, only cut at these marks to avoid damaging the circuitry.
4. Peel, Stick, & Press
Start by peeling off a small section of the adhesive backing from one end of the strip, ideally near your USB power source. Carefully align the strip and press it firmly against the prepared surface. Gradually peel off more backing as you go, pressing down firmly along the entire length to ensure a secure bond. Apply consistent pressure for a few seconds over each section.
5. Tackle Corners Like a Pro
Corners can be tricky. Here are a few methods:
- Gentle Bend: For soft curves, you can gently bend the strip.
- Pinching Method: For sharper 90-degree corners, fold the strip to create a loop or “tent” shape, then pinch it tightly to form a neat corner.
- Corner Connectors: Many kits include L-shaped or flexible corner connectors. Cut the strip at a designated mark, insert the ends into the connector, and close the clasp. These are excellent for a cleaner, more secure finish.
- Mounting Clips: Some kits provide small clips that can be screwed or adhered to the surface to hold the strip in place, especially useful for supporting corners or longer runs.
6. Power Up & Enjoy
Once your strip is securely installed, plug the USB connector into any available 5V USB port. Use your remote control, inline controller, or smartphone app to turn on the lights, adjust colors, and set your desired effects.
Keeping Your USB LED Strips Bright: Maintenance Tips
USB LED strips are generally low-maintenance, but a few simple practices can help extend their lifespan and ensure they continue to shine brightly.
- Gentle Cleaning: If dust accumulates, gently wipe the strip with a dry, soft cloth. Avoid abrasive cleaners or excessive moisture, especially if your strip isn’t water-resistant.
- Secure Connections: Periodically check that all connections (USB plug, strip connectors) are snug. Loose connections can lead to flickering or inconsistent lighting.
- Avoid Over-Bending: While flexible, constant or sharp bending, particularly near the LED components, can damage the internal wiring. Install them once and try to avoid repositioning frequently.
- Proper Power Source: Always use a compatible 5V USB power source that can provide sufficient amperage for your strip’s length and brightness. Using an underpowered source might result in dim lights, while an overpowered one is generally safe for modern strips but unnecessary.
Creative Ideas to Elevate Your Space with USB LED Strips
The possibilities for transforming your living spaces with USB LED strips are virtually endless. Let your imagination guide you!
- DIY Lightboxes: For craft enthusiasts, USB LED strips are perfect for illuminating custom lightboxes, creating unique signs or artistic displays.
- Floating Shelves: Install a strip on the underside or back edge of floating shelves to cast a soft glow downwards or against the wall, making the shelves appear to float on light.
- Closet & Drawer Lighting: Small USB LED strips with motion sensors can be easily installed in closets, drawers, or pantries, providing convenient, automatic illumination when you open them.
- Under-Bed Mood Lighting: Attach a strip to the underside of your bed frame for a subtle, ethereal glow that can act as a nightlight or create a relaxing mood.
Frequently Asked Questions (FAQ)
Are USB LED strips good for eye health?
Yes, when used as bias lighting behind a TV or monitor, USB LED strips can significantly reduce eye strain. By providing ambient light, they lessen the contrast between a bright screen and a dark room, making for a more comfortable viewing experience.
How much power do USB LED strips use?
USB LED strips are very energy-efficient. They typically operate on 5V DC and draw low amperage, often around 1A or less per meter, depending on their brightness and density. This means they consume minimal electricity, making them an eco-friendly lighting choice.
Can I make my USB LED strip longer?
It depends on the specific product. Many USB LED strips are designed to be extendable, often through connectors or by chaining multiple strips together. Always check the product specifications and maximum recommended length from the manufacturer to ensure proper functionality and brightness.
What’s the best way to cut a USB LED strip?
The best way to cut a USB LED strip is to use sharp scissors at the designated cut marks. These marks are typically indicated by a scissor icon or small copper pads, ensuring you don’t damage the internal circuitry. Never cut anywhere else on the strip.
Do USB LED strips remember their last setting?
Most modern USB LED strips, especially those with remote or app control, are designed to remember their last color and brightness setting when powered off and on. However, simpler, cheaper models might default to a specific setting or turn off completely. It’s a good feature to look for in product descriptions.
Conclusion
USB LED strips are a game-changer for anyone looking to add dynamic, customizable, and energy-efficient lighting to their home or workspace. Their easy installation, low power consumption, and incredible versatility make them an ideal solution for everything from enhancing your entertainment setup and gaming zone to creating captivating ambiance in any room.
As an expert who’s been immersed in LED technology for over a decade, I firmly believe that understanding and utilizing USB LED strips empowers you to take control of your environment’s aesthetic and functionality. Don’t hesitate to experiment with different placements and effects; you’ll be amazed at how a simple USB LED strip can transform your space. Dive in, get creative, and let NamsP be your trusted guide in illuminating your world, one vibrant strip at a time.