Transforming a mundane room into a vibrant, personalized sanctuary often feels like a daunting task, but with the right lighting, it’s surprisingly simple. That’s where Daybetter Led Strip Lights come into play. These versatile, user-friendly lighting solutions have become a go-to for homeowners, renters, and DIY enthusiasts looking to add a splash of color, enhance ambiance, or create dynamic visual effects without breaking the bank. From subtle backlighting to bold party illumination, Daybetter offers an accessible entry point into the exciting world of smart lighting.
What Are Daybetter LED Strip Lights and Why Do They Shine?
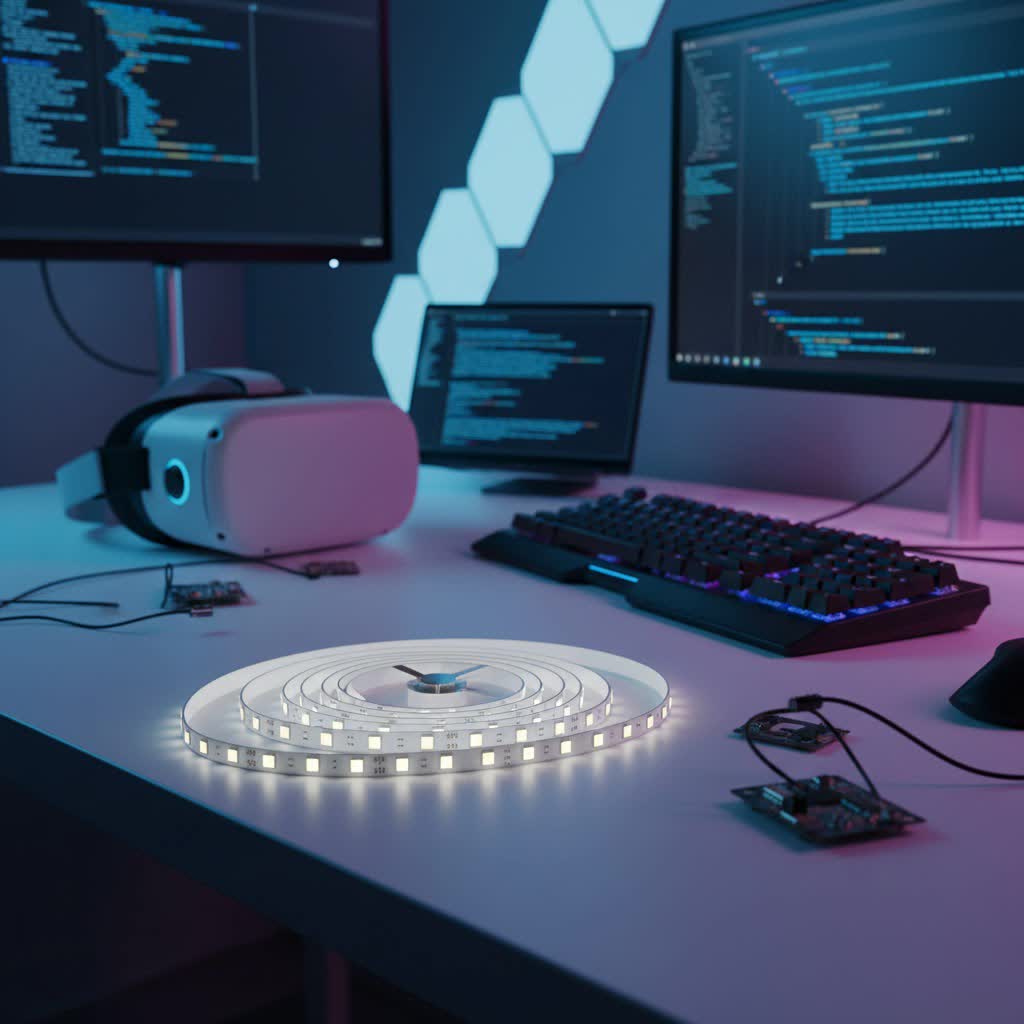
Daybetter LED strip lights are essentially flexible circuit boards lined with light-emitting diodes (LEDs) that can be stuck to almost any surface. They’re incredibly popular due to their ease of installation, energy efficiency, and wide range of customizable colors and effects. Unlike traditional bulbs, these strips offer a continuous glow, perfect for accentuating architectural features, under-cabinet lighting, or creating an immersive gaming setup.
The Daybetter Advantage: Features and Appeal
What sets Daybetter apart in the crowded LED strip market? Often, it’s their commitment to user-friendliness and affordability. Many Daybetter LED strip lights boast features like:
- Vibrant RGB & RGBIC Colors: Go beyond basic white with millions of color options. RGBIC technology allows individual segments of the strip to display different colors simultaneously, creating stunning rainbow and flowing effects.
- Flexible Lengths: Available in various lengths, typically 16.4ft, 32.8ft, or even longer, ensuring there’s a size for every project.
- Easy Control Options: Most come with an IR remote control, but many also offer seamless smartphone app integration (like the Daybetter Home app) for more sophisticated control, including music sync modes and custom DIY scenes. Some even support voice control via smart assistants.
- Strong Adhesive Backing: Designed for quick, peel-and-stick installation.
- Cuttable and Linkable: Marked cutting points allow you to trim the strip to your desired length, and connectors can be used to extend them or create custom configurations.
|
Our Picks for the Best LED Strip in 2026
As an Amazon Associate I earn from qualifying purchases.
|
||
| Num | Product | Action |
|---|---|---|
| 1 | KANTUTOE LED Lights for TV, 16.4ft LED Lights for 45-75 Inch TVs, RGB TV Backlight Behind, Music Sync Bluetooth APP & Remote Control Strip Lights USB Powered for Bedroom, Gaming, Home Décor |

|
| 2 | Govee RGBIC LED Strip Lights, Smart LED Lights for Bedroom, Bluetooth LED Lights APP Control, DIY Multiple Colors on One Line, Color Changing LED Strip Lighting Music Sync, Home Decor, 16.4ft |
|
| 3 | Govee Warm White LED Strip Lights, Bright 300 LEDs, 3000K Dimmable Light Strip 16.4ft with Control Box, LED Lights for Bedroom, Kitchen Cabinets, Living Room, ETL Listed Adapter Included |
|
| 4 | Govee 100ft RGBIC LED Strip Lights, Smart LED Lights Work with Alexa and Google Assistant, LED Lights for Bedroom WiFi App Control Segmented DIY Multiple Colors, Color Changing Light, (2 x 50ft) |
|
| 5 | KSIPZE 100ft Led Strip Lights RGB Music Sync Color Changing Led Lights with Smart App Control Remote Led Lights for Bedroom Room Lighting Flexible Home Décor |
|
| 6 | Govee RGBIC LED Strip Lights, 32.8ft Smart LED Lights for Bedroom, Bluetooth LED Lights APP Control, DIY Multiple Colors on One Line, Color Changing LED Strip Lighting Music Sync, Home Decor |
|
| 7 | Govee Smart RGB LED Strip Lights for Bedroom, 32.8ft WiFi LED Light Strip Work with Alexa Google Assistant, 16 Million Colors with App Control and Music Sync Lights for Home Decor, 2 Rolls of 16.4ft |
|
| 8 | Tenmiro Led Lights for Bedroom 100ft (2 Rolls of 50ft) Music Sync Color Changing Strip Lights with Remote and App Control RGB Strip, for Room Home Party Decoration |
|
| 9 | VOEWT LED Neon Lights Daylight White 6000K,9.8ft 110-120V LED Strip Lights,Flexible Outdoor Waterproof Neon Rope Lights for Bedroom,Cabinet,Kitchen,Living Room,Mirror,Halloween Decor |
|
| 10 | Aclorol LED Strip Lights 5V USB 6.56FT/2M 640 LEDs Blue Indoor Rope Lights for Bedroom Not Waterproof IP20 CRI85+ Flexible LED Light for TV Backlight Living Room Party DIY Lighting |
|
Picking the Perfect Daybetter LED Strip for Your Project
Choosing the right Daybetter LED strip lights can feel a bit overwhelming with so many options. Here’s how to narrow down your choices and find the perfect match for your lighting dreams:
Consider Your Space and Desired Effect
- Where will the lights go? Under cabinets, behind a TV, along a ceiling cove, or outlining furniture? Measure the length you need carefully.
- What kind of ambiance are you after? Cozy and warm, vibrant and energetic, or a sleek, modern look?
- Do you need waterproof lights? For bathrooms, kitchens, or outdoor applications, look for strips with an IP65 rating or higher, indicating resistance to water splashes or jets.
Key Specifications to Look For
- Length: Daybetter offers various lengths. It’s always better to get a slightly longer strip and trim it than to come up short.
- Color Type:
- RGB: Displays a single color across the entire strip at any given time. Great for solid color accents.
- RGBIC: (Individually Addressable Control) Allows multiple colors to display simultaneously on different sections of the strip, enabling dynamic chasing, flowing, and rainbow effects. If you want more advanced animations, RGBIC is the way to go.
- Brightness (Lumens): While not always explicitly stated for strip lights, higher density of LEDs per meter generally means more brightness. For ambient lighting, standard brightness is fine. For task lighting or illuminating larger areas, look for denser strips.
- Control Method: Do you prefer a simple IR remote, or do you want the advanced features of an app (like the Daybetter Home app) for scheduling, music sync, and custom scenes? Many strips offer both.
- Power Supply: Ensure the kit includes a suitable power adapter for your region and the strip’s length.
“When selecting Daybetter LED strip lights, always prioritize your specific application,” advises Leo Tran, a veteran lighting designer. “For vibrant, interactive displays, go RGBIC. For subtle background glow, a standard RGB strip often suffices and saves you a few dollars.”
Seamless Installation: A Step-by-Step Guide to Your Daybetter LED Strips
Installing Daybetter LED strip lights is designed to be straightforward, even for beginners. Here’s a simple breakdown to get you glowing:
1. The Pre-Installation Checklist
Before you begin, gather your tools:
- Your Daybetter LED strip light kit
- Measuring tape
- Scissors (if you need to cut the strip)
- Rubbing alcohol and a clean cloth
- Pencil (for marking)
- Optional: mounting clips for extra security, cable ties for tidiness.
2. Plan and Measure
- Lay out your path: Unroll the LED strip and visually plan where it will go. This helps you anticipate corners and cutting points.
- Measure: Use your tape measure to determine the exact length you need.
- Mark cutting points: Daybetter LED strips have designated cutting marks, usually indicated by a copper line and a scissor icon. Only cut at these points to avoid damaging the circuit.
3. Prepare the Surface
- Clean thoroughly: This is arguably the most crucial step. Use rubbing alcohol and a clean cloth to wipe down the entire surface where the strip will adhere. Dust, grease, or grime will significantly weaken the adhesive. Let it dry completely.
- Test adhesion: If you’re unsure about a surface, test a small piece of the adhesive backing in an inconspicuous spot.
4. Peel, Stick, and Press
- Peel gradually: Start at one end, peeling off a few inches of the adhesive backing at a time.
- Apply firmly: Press the strip onto the clean, dry surface, working your way along. Apply consistent pressure for several seconds to ensure a strong bond. Avoid pulling or stretching the strip.
- Corners: For sharp 90-degree corners, you can gently bend the strip, but for a cleaner look and to prevent damage, consider using L-shaped connectors (often sold separately or included in advanced kits) or cutting and joining with corner connectors.
5. Connect and Power Up
- Connect the strip to the controller: Ensure the arrows on the strip and controller align correctly. This is vital for proper color display.
- Connect the controller to the power adapter: Plug in the power adapter to the controller.
- Plug into an outlet: Finally, plug the power adapter into a wall outlet.
- Test: Use the remote or app to test all colors, brightness levels, and modes.
Blockquote:
Pro Tip: For surfaces that aren’t perfectly smooth or if you plan to move the lights often, invest in some small mounting clips. They offer extra security and can prolong the life of your adhesive.
Troubleshooting Common Daybetter LED Strip Light Issues
Even the most reliable Daybetter LED strip lights can occasionally encounter a hiccup. Here’s a quick guide to common issues and their fixes:
Why are my Daybetter LED strip lights not turning on?
First, check all power connections. Ensure the power adapter is securely plugged into both the wall outlet and the controller, and that the controller is correctly connected to the LED strip, with arrows aligned. Try a different outlet or power adapter if available.
My Daybetter remote isn’t working – what should I do?
Make sure there are no obstructions between the remote and the IR receiver on the controller. Check the battery in the remote and replace it if necessary. If using an app, ensure Bluetooth or Wi-Fi is enabled on your device and the app is properly paired with the lights.
Why is only a segment of my Daybetter LED strip not lighting up?
This often indicates a damaged connection point or a faulty LED within that segment. If you’ve cut the strip, ensure the cut was made cleanly at the designated mark and that any connectors used are properly installed. In some cases, a small section might be irreparable, but the rest of the strip should still function.
My Daybetter LED strip lights are flickering. How can I fix this?
Flickering can be caused by a loose connection, an overloaded power supply, or a faulty power adapter. Double-check all connections. If you’ve extended the strip significantly, ensure your power adapter is sufficient for the total length. Replacing the power adapter might also resolve the issue.
Maximizing Longevity: Care and Maintenance for Your Daybetter LED Lights
You want your Daybetter LED strip lights to keep shining bright for years. A little care goes a long way:
- Gentle Cleaning: If dust accumulates, gently wipe the strips with a dry, soft cloth. Avoid harsh chemicals or excessive moisture, especially if your strips aren’t waterproof.
- Avoid Sharp Bends: While flexible, LED strips are not indestructible. Bending them too sharply, especially at the connection points, can damage the internal circuitry. Use connectors for corners.
- Proper Power Supply: Always use the power adapter provided with your Daybetter LED strip lights, or a compatible one with the correct voltage and amperage. Using an incorrect power supply can shorten the lifespan of the LEDs or even damage them.
- Heat Dissipation: Although LEDs produce less heat than traditional bulbs, ensure they are not installed in enclosed spaces without adequate airflow, which can lead to overheating and premature failure.
Creative Illumination: Decorating Ideas with Daybetter LED Strip Lights
Daybetter LED strip lights are not just for basic lighting; they’re a powerful tool for creative expression. Here are some ideas to spark your imagination:
- TV Backlighting: Attach a Daybetter LED strip behind your TV to reduce eye strain, enhance contrast, and create a captivating home theater experience.
- Under Cabinet Lighting: Illuminate kitchen countertops for both task lighting and ambient glow.
- Gaming Setup Enhancement: Outline your desk, monitor, or shelves to create an immersive, responsive gaming environment. Many Daybetter strips sync with music or game audio.
- Bedroom Ambiance: Place strips under your bed, behind your headboard, or along ceiling coves for a soft, inviting glow that can be adjusted to any mood.
- Architectural Accents: Highlight crown molding, shelving, or wall niches to draw attention to unique features in your home.
- Holiday & Party Decor: Easily transform your space for any occasion with dynamic color changes and festive modes.
Expert Insight
“The real magic of Daybetter LED strip lights lies in their accessibility and versatility,” says Maya Patel, a renowned interior decorator specializing in smart lighting. “They empower anyone to become their own lighting designer, experimenting with color and mood without a hefty investment. Don’t be afraid to think outside the box; these strips can truly redefine a space.”
Frequently Asked Questions About Daybetter LED Strip Lights
Are Daybetter LED strip lights waterproof?
Many Daybetter LED strip lights are designed for indoor use and are not waterproof. However, Daybetter does offer models with an IP65 rating or higher, which are splash-proof or water-resistant, suitable for outdoor covered areas or bathrooms. Always check the product specifications.
How do I connect Daybetter LED strip lights to my phone?
Most app-controlled Daybetter LED strip lights use Bluetooth or Wi-Fi. Download the designated Daybetter Home app, ensure Bluetooth/Wi-Fi is enabled on your phone, and follow the in-app instructions to pair your lights. This usually involves powering the lights on and off a few times to enter pairing mode.
Can I cut Daybetter LED strip lights?
Yes, Daybetter LED strip lights can typically be cut at specific, marked intervals. Look for copper pads and a scissor icon on the strip. Cutting anywhere else will likely damage the circuit and render that section unusable.
What’s the difference between RGB and RGBIC Daybetter lights?
RGB (Red, Green, Blue) lights can display a single color across the entire strip at one time. RGBIC (Red, Green, Blue, Independent Control) lights have an integrated independent control chip that allows multiple colors to be displayed on different segments of the strip simultaneously, enabling more complex and dynamic lighting effects.
My Daybetter remote isn’t working, what should I do?
First, ensure the remote’s battery is functional and correctly inserted. Point the remote directly at the IR receiver on the LED strip’s controller. Remove any obstacles in the path. If it still doesn’t work, try replacing the battery or using the companion app if available.
Light Up Your World with Daybetter
From transforming your gaming station into a neon wonderland to adding a sophisticated glow under your kitchen cabinets, Daybetter LED strip lights offer an unparalleled combination of affordability, flexibility, and stunning visual appeal. They democratize dynamic lighting, making it easy for anyone to customize their environment. With a little planning and these straightforward tips, you’re well on your way to creating captivating lighting schemes that truly reflect your style and enhance your home. So go ahead, unleash your inner lighting designer and let your space shine!