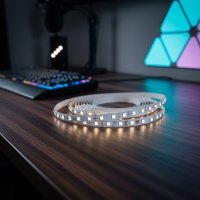
Ever walked into a kitchen that just glows? That subtle, inviting light emanating from under the cabinets, perfectly illuminating the countertops without any harsh glares? That, my friend, is the magic of LED cabinet lighting strips, and it’s an upgrade that’s more accessible than you might think. Whether you’re a seasoned DIYer or just dipping your toes into home improvement, integrating these versatile lighting solutions can transform your space from drab to dazzling, making everyday tasks easier and adding a touch of modern elegance.
At NamsP, we believe that understanding your lighting options empowers you to create the perfect ambiance and functionality in your home. LED strip lights offer a fantastic blend of style, efficiency, and customization, making them an ideal choice for breathing new life into your cabinets, shelves, and display areas. Forget the bulky, outdated fixtures of the past; with LED strips, you’re embracing a sleek, energy-saving future.
Why LED Strip Lights Are a Brilliant Choice for Cabinet Lighting
When it comes to illuminating the often-overlooked spaces beneath and within your cabinets, LED strip lights truly shine. They offer a host of advantages that traditional lighting solutions simply can’t match:
- Seamless Customization: LED strips are incredibly flexible and can be cut at designated points, allowing you to perfectly fit any cabinet length or contour. This means no awkward gaps or overhangs, just continuous, smooth illumination.
- Discreet and Low-Profile: Their slim design ensures that the light source itself remains hidden, creating a sophisticated, indirect glow that highlights your countertops or cabinet contents rather than drawing attention to the strip itself.
- Even Illumination: Unlike puck lights or bulky light bars that can create noticeable hot spots or shadows, LED strips provide a uniform wash of light across the entire surface. This is particularly beneficial for task lighting in the kitchen, where consistent illumination is key.
- Energy Efficiency & Longevity: LEDs consume significantly less electricity than older lighting technologies and boast an impressive lifespan, often lasting 50,000 hours or more. This translates to lower energy bills and fewer bulb replacements, saving you money and hassle in the long run.
- Aesthetic Appeal: Beyond functionality, LED cabinet lighting instantly modernizes any space. It adds depth, highlights textures, and creates a welcoming, high-end look that can significantly boost your home’s appeal.
Selecting the Perfect LED Cabinet Lighting Strip
Choosing the right LED strip isn’t just about picking a color. It involves considering several factors to ensure you get the perfect lighting effect and performance for your specific needs. Think of it as tailoring your light to your lifestyle!
Brightness (Lumens): How Much Light Do You Need?
|
Our Picks for the Best LED Strip in 2026
As an Amazon Associate I earn from qualifying purchases.
|
||
| Num | Product | Action |
|---|---|---|
| 1 | VOEWT LED Neon Lights Daylight White 6000K,9.8ft 110-120V LED Strip Lights,Flexible Outdoor Waterproof Neon Rope Lights for Bedroom,Cabinet,Kitchen,Living Room,Mirror,Halloween Decor |

|
| 2 | Govee RGBIC LED Strip Lights, Smart LED Lights for Bedroom, Bluetooth LED Lights APP Control, DIY Multiple Colors on One Line, Color Changing LED Strip Lighting Music Sync, Home Decor, 16.4ft |
|
| 3 | KANTUTOE LED Lights for TV, 16.4ft LED Lights for 45-75 Inch TVs, RGB TV Backlight Behind, Music Sync Bluetooth APP & Remote Control Strip Lights USB Powered for Bedroom, Gaming, Home Décor |
|
| 4 | Govee Smart RGB LED Strip Lights for Bedroom, 32.8ft WiFi LED Light Strip Work with Alexa Google Assistant, 16 Million Colors with App Control and Music Sync Lights for Home Decor, 2 Rolls of 16.4ft |
|
| 5 | Govee 100ft RGBIC LED Strip Lights, Smart LED Lights Work with Alexa and Google Assistant, LED Lights for Bedroom WiFi App Control Segmented DIY Multiple Colors, Color Changing Light, (2 x 50ft) |
|
| 6 | Govee Warm White LED Strip Lights, Bright 300 LEDs, 3000K Dimmable Light Strip 16.4ft with Control Box, LED Lights for Bedroom, Kitchen Cabinets, Living Room, ETL Listed Adapter Included |
|
| 7 | Tenmiro Led Lights for Bedroom 100ft (2 Rolls of 50ft) Music Sync Color Changing Strip Lights with Remote and App Control RGB Strip, for Room Home Party Decoration |
|
| 8 | Govee RGBIC LED Strip Lights, 32.8ft Smart LED Lights for Bedroom, Bluetooth LED Lights APP Control, DIY Multiple Colors on One Line, Color Changing LED Strip Lighting Music Sync, Home Decor |
|
| 9 | KSIPZE 100ft Led Strip Lights RGB Music Sync Color Changing Led Lights with Smart App Control Remote Led Lights for Bedroom Room Lighting Flexible Home Décor |
|
| 10 | Aclorol LED Strip Lights 5V USB 6.56FT/2M 640 LEDs Blue Indoor Rope Lights for Bedroom Not Waterproof IP20 CRI85+ Flexible LED Light for TV Backlight Living Room Party DIY Lighting |
|
The brightness of an LED strip is measured in lumens. Your choice here depends on the primary purpose of your lighting:
- Accent Lighting: If you’re looking for a soft, subtle glow to highlight decorative items or create a relaxed mood, lower lumen output strips will do the trick.
- Task Lighting: For areas like kitchen countertops where you’ll be prepping food, reading, or working, you’ll need brighter illumination. “For optimal task lighting, especially in busy kitchen areas, I always recommend looking for LED strips with at least 500-1,000 lumens per foot,” advises Sarah Chen, a renowned Lighting Design Specialist. “This ensures you have ample light to safely and efficiently perform your activities without straining your eyes.”
- Principal Lighting: In some cases, especially in smaller spaces or for specific cabinet designs, under-cabinet lighting might be your primary light source. For this, opt for high-output strips, often paired with a dimmer for flexibility.
Color Temperature (CCT): Setting the Mood
Color temperature, measured in Kelvin (K), dictates the “warmth” or “coolness” of the white light. This single factor can dramatically alter the mood and style of your room:
- Warm White (2700K-3000K): Emits a soft, yellowish glow, similar to traditional incandescent bulbs. Perfect for creating a cozy, inviting, or traditional atmosphere.
- Natural White (3000K-4000K): A balanced, neutral white that closely mimics natural daylight. It’s highly versatile and works well in most settings, offering clarity without being too warm or too cool.
- Cool White (4000K-5000K): Produces a crisp, bright white light with a hint of blue. Ideal for modern, minimalist designs, task-oriented areas, and spaces where you want a clean, energetic feel.
- Tunable White (CCT): These strips allow you to adjust the color temperature from warm to cool, offering incredible flexibility to change the ambiance throughout the day.
- RGB/RGBW: If you dream of vibrant colors, RGB (Red, Green, Blue) or RGBW (Red, Green, Blue, White) strips are your go-to. RGBW strips are generally preferred as they include a dedicated white LED chip, providing a purer, more accurate white light compared to an RGB-only strip trying to mix colors to create white.
A general rule of thumb is to match your under-cabinet lighting’s color temperature with any existing lighting in the room for a cohesive look. However, don’t hesitate to experiment with tunable white strips for ultimate control over your space’s aesthetic.
Voltage (12V vs. 24V): Powering Your Project
LED strips commonly come in 12-volt (12V) and 24-volt (24V) options. While both work effectively, 24V systems are often recommended for longer runs of LED strips. This is because 24V allows for longer continuous segments without experiencing noticeable “voltage drop”—a phenomenon where the light appears dimmer towards the end of a long strip due to power loss. If your setup involves extensive runs, a 24V system can simplify your wiring and ensure consistent brightness. For shorter segments or projects powered by existing 12V battery systems, 12V strips are perfectly suitable.
LED Density: Smoothness Matters
LED density refers to the number of individual LEDs per meter or foot of the strip. A higher density (e.g., 120 or 180 LEDs per meter) results in a brighter, more uniform light output with less visible “spotting” (where you can see individual LED dots). This is especially important for under-cabinet lighting where the strips might be visible or reflect off glossy countertops.
For highly reflective surfaces like granite countertops, COB (Chip-on-Board) LED strips are a game-changer. These strips feature multiple LED chips directly mounted to a circuit board, then covered with a continuous phosphor layer, creating a seamless line of light without any visible dots, even without a diffuser.
Waterproof Rating (IP Rating): Kitchen-Friendly Features
While not always strictly necessary for all under-cabinet applications, considering an LED strip with an appropriate Ingress Protection (IP) rating is smart, especially in kitchens. Areas near sinks, stoves, or kettles can expose your lighting to splashes, steam, and grease. An IP65 rating signifies protection against dust and low-pressure water jets, offering peace of mind. However, if you’re installing your LED strips within aluminum channels with end caps, the channel itself offers a good degree of protection, potentially making a highly waterproof strip less imperative.
Dimmability: Control at Your Fingertips
Most LED strips today are dimmable, a feature that’s highly recommended. Dimmable lighting allows you to adjust the brightness to suit any activity or mood, from bright task lighting for cooking to a soft, ambient glow for entertaining. Always ensure your chosen LED strips are compatible with your dimmer and controller to avoid issues like flickering or premature failure.
Your DIY Toolkit: Gathering the Essentials
Before you embark on your LED cabinet lighting adventure, gather these crucial tools and components. Having everything ready will make the installation process smoother and more enjoyable.
- LED Strip Lights: The star of the show! Choose based on brightness, color temperature, voltage, and density.
- Power Supply (LED Driver): This converts your household AC power to the low-voltage DC power your LEDs need. Crucial tip: Always select a power supply with a wattage rating at least 20% higher than the total wattage of your LED strips to prevent overheating and ensure longevity. So, if your strips total 80 watts, aim for a 100-watt power supply.
- LED Controller and Dimmer (Optional but Recommended): For adjusting brightness, changing colors (RGB/RGBW), or tuning white light (CCT). Can be remote-controlled, wall-mounted, or smart-app enabled.
- Connecting Cables/Wires: Low-voltage wires to connect strip segments, controllers, and the power supply. Ensure the wire gauge is appropriate for the length of your runs and matches the voltage of your strips (12V or 24V).
- Solderless Connectors or Soldering Supplies: Solderless connectors are a DIY dream for easy, secure connections between strip segments and wires without special tools. For those comfortable with it, soldering provides the most robust connection.
- Mounting Clips or Strong Double-Sided Adhesive Tape: While most LED strips come with adhesive backing, supplementary mounting clips or heavy-duty double-sided tape can provide extra security, especially on textured or uneven surfaces.
- Aluminum Channels/Profiles: Highly recommended for a professional finish. These channels diffuse the light, reduce spotting, protect the LED strips from dust and damage, and aid in heat dissipation, extending the life of your LEDs.
- Wire Clips or Cable Management Solutions: Essential for keeping wires tidy, concealed, and safe, contributing to a clean, professional look.
- Cleaning Supplies: Isopropyl alcohol and clean cloths are vital for preparing surfaces, especially if relying on adhesive mounting.
- Scissors or Utility Knife: For cutting LED strips (at designated marks) and wires.
- Measuring Tape: For accurate measurements.
Step-by-Step Installation Guide for LED Cabinet Lighting Strips
Ready to light up your life? Here’s a straightforward guide to installing LED cabinet lighting strips like a pro.
Step 1: Plan Your Layout and Measure
This is where the magic begins! Before any cutting or sticking, visualize your lighting. Decide exactly where you want the light to fall and where you want to conceal the strips themselves (usually towards the front lip or slightly recessed under the cabinet for indirect lighting). Measure the precise lengths of your cabinet sections. Remember, LED strips can only be cut at clearly marked points, usually every few inches, indicated by a scissor icon and copper pads. Mark these cutting points on your strips carefully.
Step 2: Prepare the Surface
“Cleanliness is next to godliness, especially when it comes to LED strip installation,” says Michael Davis, a veteran electrical technician with a decade of experience in lighting installations. “Any dust, grease, or grime will compromise the adhesive, leading to frustrating failures down the road.” Use isopropyl alcohol and a clean cloth to thoroughly clean the underside of your cabinets. Allow the surface to dry completely before proceeding. A perfectly clean, dry surface ensures maximum adhesion.
Step 3: Cut and Connect Strips
Using sharp scissors or a utility knife, carefully cut your LED strips at the marked cutting lines. If your layout requires multiple sections or needs to navigate corners, use solderless connectors (L-shaped, Y-shaped, or straight) to bridge the gaps. When connecting, ensure you align the positive (+) and negative (-) terminals correctly on both the strip and the connector. Incorrect polarity can lead to color inconsistencies or the strip not lighting up at all.
Step 4: Attach the LED Strips (and Channels)
If you’re using aluminum channels, mount them securely to the underside of your cabinets first using screws or strong adhesive. Then, peel off the adhesive backing from your LED strips and carefully press them into place inside the channels. If not using channels, simply peel and stick the strips directly to your cleaned cabinet surface. Apply firm, even pressure along the entire length to ensure a strong bond. For best results, position the strip slightly back from the front lip of the cabinet to hide the light source and prevent direct glare on your countertops.
Step 5: Connect to Power Supply & Controller
Now for the wiring! Connect your LED strips to your controller (if using one) and then to your power supply. Pay close attention to polarity (+ to +, – to -). If you’re using solderless connectors for wiring, ensure the wires are securely clamped. Mount your power supply in a discreet yet accessible location, such as inside an upper cabinet or behind a kick panel. Ensure it has adequate ventilation and is protected from moisture. If you’re unsure about mains voltage wiring, it’s always wise to consult a qualified electrician.
Step 6: Manage Wires
A professional installation is all about neatness. Use wire clips, cable ties, or small channels to route and conceal any visible wires. You can often tuck wires into the small gaps between cabinets, along the back edges, or drill small, discreet holes through cabinet partitions if necessary. The goal is for the only thing you see to be the beautiful light, not the messy wiring!
Step 7: Test Everything
Before you make everything permanently secure, plug in your power supply and turn on your lights! Test all segments of your LED strip to ensure they light up correctly and consistently. If you have a dimmer or controller, test its functions (brightness adjustment, color changes, smart features) to confirm everything is working as expected. This vital step can save you a lot of backtracking and frustration.
Troubleshooting Common LED Cabinet Lighting Issues
Even with the best planning, sometimes things don’t go perfectly. Don’t worry, many common LED strip issues have straightforward solutions.
Lights Not Turning On
- Check Power: Is the power supply plugged in? Is the wall outlet working? Check your circuit breaker.
- Verify Connections: Are all wires and connectors securely attached? Double-check positive (+) and negative (-) polarity at every connection point.
- Power Supply Failure: Test your power supply by plugging it into a different outlet or trying a known working strip with it.
Flickering Lights
- Incompatible Dimmer/Controller: Ensure your dimmer or controller is specifically designed for LED strips and is compatible with your strip’s voltage.
- Loose Connections: Inspect all connections for any wires that might have come loose.
- Voltage Fluctuations/Overload: Ensure your power supply is adequate for the total length of your strips (remember the 80% rule!). An overloaded power supply can cause flickering.
- Voltage Drop: If flickering occurs mainly at the end of a long run, it might be voltage drop. Consider powering the strip from both ends or using a higher voltage system (24V).
Uneven Lighting or “Spotting”
- LED Density: If you see individual LED dots, your strip might have a lower LED density. Consider using a diffuser cover within an aluminum channel to create a more continuous light line.
- COB Strips: For highly reflective surfaces, COB LED strips are the best solution as they inherently provide a dot-free light.
- Placement: Adjust the position of the strip; sometimes moving it slightly forward or back from the cabinet lip can improve diffusion.
Adhesive Failure
- Surface Preparation: Revisit Step 2! The most common cause is inadequate cleaning.
- Heat/Humidity: In kitchens, steam and heat can weaken adhesive over time.
- Solution: Clean and dry the surface thoroughly again. For a more permanent fix, use additional mounting clips or a stronger, heat-resistant double-sided tape.
Color Inconsistencies (Especially with Tunable or RGB Strips)
- Reversed Polarity: This is a frequent culprit, especially when connecting multiple segments. Double-check that all positive and negative terminals are correctly aligned at every connector. A misaligned connection can cause one section to display a different color or not light up correctly.
Voltage Drop (Dimming at the End of a Run)
- Long Runs: This typically happens with very long LED strip installations, especially with 12V systems.
- Solutions: Use a 24V LED strip system for longer runs, or “power inject” by running additional wires to the middle or end of your strip to supply more power. Powering the strip from both ends can also effectively combat voltage drop.
Creative Ideas for LED Cabinet Lighting Strips
The versatility of LED strips goes far beyond just under-cabinet task lighting. Unleash your creativity and explore these inspiring ideas:
- Above-Cabinet Accent Lighting: Place LED strips on top of your wall cabinets, facing the ceiling. This creates a soft, upward glow that highlights architectural features and adds ambient light to the room, making the ceiling appear higher.
- Toe-Kick Lighting: Install LED strips along the base of your floor cabinets. This subtle floor-level illumination is perfect as a night light, guides you through the kitchen after dark, and adds a futuristic touch.
- Showcase and Display Cabinets: Use LED strips to illuminate the inside of glass-front cabinets, china cabinets, or display shelves. It beautifully highlights your cherished items, making them pop.
- Closet Lighting: Banish dark closets! LED strips can be easily installed along shelves or the top interior of closets, providing much-needed light to find clothes and accessories.
- Integrated Design: Extend your LED cabinet lighting to other areas of your home, such as a bar area, built-in bookshelves, or even bathroom vanities, to create a cohesive and sophisticated lighting scheme.
- Smart Home Integration: Pair your LED strips with smart controllers to control them via voice commands, smartphone apps, or integrate them into automated lighting scenes. Imagine setting a “dinner party” scene that dims your main lights and activates a warm, inviting glow under your cabinets!
Maintaining Your LED Cabinet Lighting
LED strips are relatively low-maintenance, but a little care can ensure they continue to perform beautifully for years to come. Gently wipe down the strips and diffusers with a soft, damp cloth periodically to remove dust and grease buildup, which can dim the light output. Occasionally check connections for any looseness, especially after significant vibrations or temperature changes. Promptly addressing any flickering or inconsistencies can prevent minor issues from becoming bigger problems.
Light Up Your World with NamsP
Transforming your home with LED cabinet lighting strips is an exciting and rewarding project. With the right selection, careful installation, and a touch of creativity, you can elevate the aesthetics and functionality of your space, making it more inviting, efficient, and truly yours.
At NamsP, we are dedicated to providing you with the expert knowledge and practical advice you need to confidently tackle your DIY lighting projects. From choosing the perfect strip to troubleshooting any bumps along the way, we’re here to be your trusted partner in illuminating your world. So go ahead, explore the endless possibilities of LED cabinet lighting strips, and get ready to experience your home in a whole new light! Share your projects and ideas with us – we love seeing how you bring your vision to life!
Get our weekly buyer guide
Practical specs, not advice. Unsubscribe anytime.