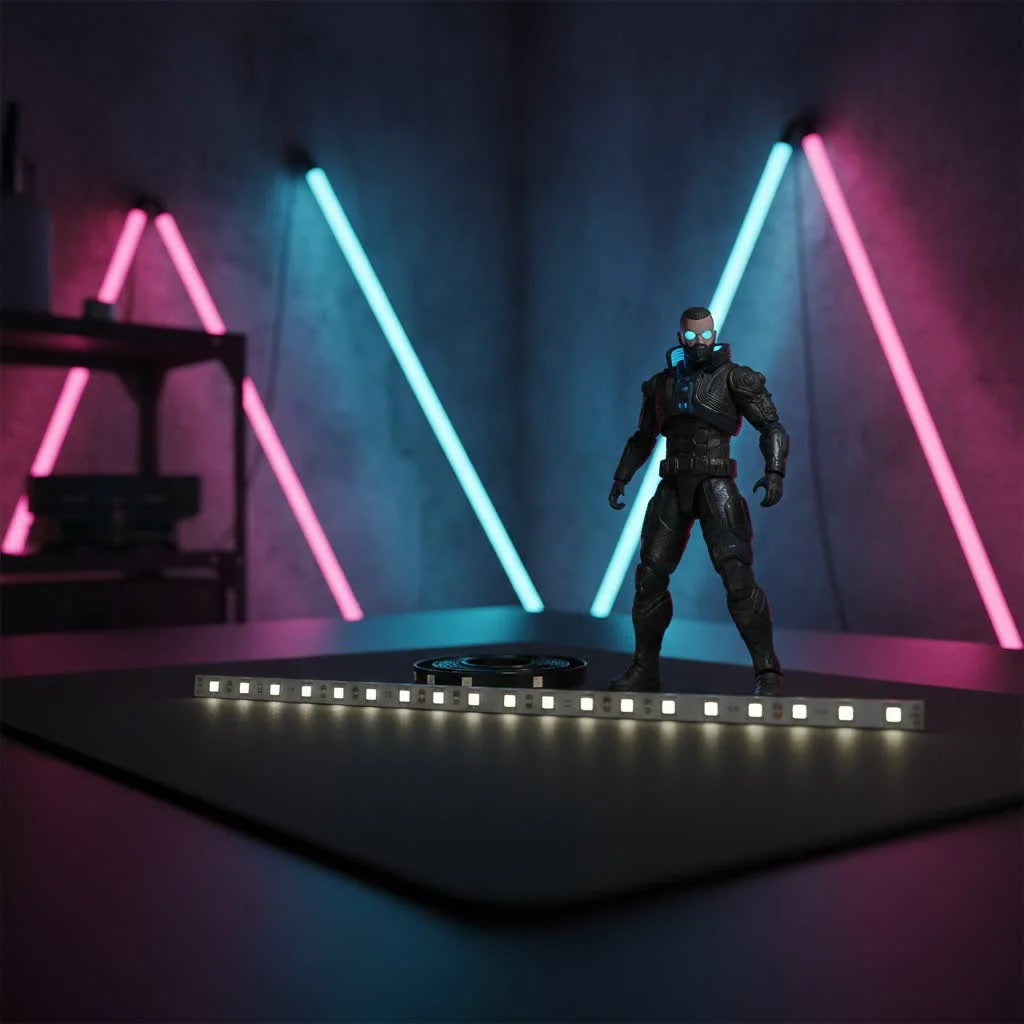
The WS2812B LED strip is a type of individually addressable lighting that allows each LED on the strip to display a specific color and brightness independently, unlike traditional LED strips where all LEDs in a segment show the same color. This innovation, often called NeoPixel, integrates a control circuit and RGB chip into a compact 5050 surface-mount package, enabling dynamic and customizable lighting effects with 16.7 million distinct colors per LED.
What Makes WS2812B LED Strips So Special?
The WS2812B isn’t just another LED strip; it’s a tiny powerhouse that brings a world of possibilities to your fingertips. This innovative component, often referred to as NeoPixel, integrates the control circuit and RGB chip into a compact 5050 surface-mount package, making each LED an independent light source.
The Magic of Individually Addressable LEDs
What does “individually addressable” really mean? It means you can command each and every LED on your strip to display a specific color and brightness, completely independent of its neighbors. This is achieved through a built-in smart controller (IC) within each LED, communicating via a single data line. Imagine creating flowing rainbows, subtle fades, or intricate patterns where every pixel plays its part – that’s the magic of the WS2812B LED strip. With an 8-bit RGB color depth, each LED can display 256 levels of brightness per color, creating an astounding 16.7 million distinct colors.
Key Features at a Glance
- Independent Control: Each LED’s color and brightness can be set individually, enabling complex visual effects.
- Cascade Connection (Chainable): Multiple strips can be connected in series, passing data from one to the next, simplifying wiring for long runs.
- Wide Color Gamut: Produce millions of colors by combining red, green, and blue LEDs with varying intensities.
- Compact Size: The integrated chip in the 5050 package means a smaller footprint for the overall strip.
- Digital Control: Program these strips with microcontrollers using a straightforward serial communication protocol.
“The WS2812B fundamentally changed how we approach DIY lighting. Its individual addressability transformed static lights into dynamic canvases, opening up endless creative avenues for hobbyists and professionals alike,” says Dr. Lena Khan, an electrical engineering professor and smart lighting consultant.
Choosing the Right WS2812B LED Strip for Your Project
Selecting the perfect WS2812B LED strip involves a few key considerations to ensure it meets your project’s aesthetic and functional demands.
Density Matters: LEDs per Meter
Why is LED density important? The number of LEDs per meter directly impacts the strip’s brightness, smoothness of effects, and whether individual LEDs are visible (pixelation). Common densities include 30, 60, or 144 LEDs/meter. Higher densities create a more continuous light effect, ideal for ambient lighting where you want a uniform glow. Lower densities are more noticeable as individual points of light, suitable for accent lighting or displays where you want to emphasize distinct pixels.
Indoor vs. Outdoor: Understanding IP Ratings
|
Our Picks for the Best LED Strip in 2026
As an Amazon Associate I earn from qualifying purchases.
|
||
| Num | Product | Action |
|---|---|---|
| 1 | Govee Smart RGB LED Strip Lights for Bedroom, 32.8ft WiFi LED Light Strip Work with Alexa Google Assistant, 16 Million Colors with App Control and Music Sync Lights for Home Decor, 2 Rolls of 16.4ft |

|
| 2 | Govee RGBIC LED Strip Lights, 32.8ft Smart LED Lights for Bedroom, Bluetooth LED Lights APP Control, DIY Multiple Colors on One Line, Color Changing LED Strip Lighting Music Sync, Home Decor |
|
| 3 | Govee RGBIC LED Strip Lights, Smart LED Lights for Bedroom, Bluetooth LED Lights APP Control, DIY Multiple Colors on One Line, Color Changing LED Strip Lighting Music Sync, Home Decor, 16.4ft |
|
| 4 | Govee 100ft RGBIC LED Strip Lights, Smart LED Lights Work with Alexa and Google Assistant, LED Lights for Bedroom WiFi App Control Segmented DIY Multiple Colors, Color Changing Light, (2 x 50ft) |
|
| 5 | Aclorol LED Strip Lights 5V USB 6.56FT/2M 640 LEDs Blue Indoor Rope Lights for Bedroom Not Waterproof IP20 CRI85+ Flexible LED Light for TV Backlight Living Room Party DIY Lighting |
|
| 6 | Govee Warm White LED Strip Lights, Bright 300 LEDs, 3000K Dimmable Light Strip 16.4ft with Control Box, LED Lights for Bedroom, Kitchen Cabinets, Living Room, ETL Listed Adapter Included |
|
| 7 | VOEWT LED Neon Lights Daylight White 6000K,9.8ft 110-120V LED Strip Lights,Flexible Outdoor Waterproof Neon Rope Lights for Bedroom,Cabinet,Kitchen,Living Room,Mirror,Halloween Decor |
|
| 8 | KANTUTOE LED Lights for TV, 16.4ft LED Lights for 45-75 Inch TVs, RGB TV Backlight Behind, Music Sync Bluetooth APP & Remote Control Strip Lights USB Powered for Bedroom, Gaming, Home Décor |
|
| 9 | Tenmiro Led Lights for Bedroom 100ft (2 Rolls of 50ft) Music Sync Color Changing Strip Lights with Remote and App Control RGB Strip, for Room Home Party Decoration |
|
| 10 | KSIPZE 100ft Led Strip Lights RGB Music Sync Color Changing Led Lights with Smart App Control Remote Led Lights for Bedroom Room Lighting Flexible Home Décor |
|
What do IP ratings tell you? Ingress Protection (IP) ratings indicate how well an electrical enclosure protects against solids and liquids. For WS2812B LED strips:
- IP30 (Non-waterproof): Best for indoor use in dry environments like behind a TV or under cabinets.
- IP65 (Splashproof): Coated with silicone, suitable for areas exposed to light splashes but not direct water immersion.
- IP67/IP68 (Waterproof): Encased in a silicone tube or fully potted, designed for outdoor use or areas with potential submersion. Always choose a strip with an appropriate IP rating for your environment to ensure longevity and safety.
Voltage and Length: 5V Power Considerations
What about power? WS2812B LED strips typically operate at 5V. While lower voltage offers safety benefits, it also means higher current draw for the same power, making voltage drop a significant concern for longer strips. Each WS2812B LED can draw up to 60mA at full brightness (white). For example, a 5-meter strip with 60 LEDs/meter has 300 LEDs, potentially drawing 18 Amps! This necessitates robust power planning.
Setting Up Your WS2812B LED Strip: A Step-by-Step Guide
Getting your WS2812B LED strip up and running is a rewarding experience. Here’s what you’ll need and how to wire it safely.
Essential Tools and Components
Before you begin, gather these items:
- WS2812B LED Strip
- Microcontroller (e.g., Arduino Uno, ESP32)
- 5V DC Power Supply (rated for adequate current)
- Jumper Wires
- Breadboard (for prototyping)
- 100-1000 µF Capacitor (6.3V or higher)
- 220-470 Ohm Resistor
- Wire Strippers/Cutters
- Soldering Iron and Solder (optional, for permanent connections)
- Heat Shrink Tubing (optional, for insulation)
Wiring It Up Safely
Connecting your WS2812B LED strip is straightforward, but precision is key.
- Identify Pins: Your WS2812B strip will have three main connections:
- VCC (5V): Power input, usually red.
- GND: Ground, usually white or black.
- DIN (Data In): Data input, usually green or yellow.
- Connect Power: Connect the VCC pin of the LED strip to the positive (+) terminal of your 5V power supply. Connect the GND pin of the LED strip to the negative (-) terminal of your 5V power supply.
- Establish Common Ground: Ensure the GND pin of your microcontroller is also connected to the common ground of your power supply and LED strip. This is crucial for reliable data communication.
- Connect Data: Connect a digital output pin on your microcontroller (e.g., ESP32’s GPIO 13 or Arduino’s Digital Pin 6) to the DIN pin of your LED strip.
Crucial Protections: Capacitor and Resistor
Don’t skip these vital components!
- Capacitor: Solder a large electrolytic capacitor (100-1000 µF, 6.3V or higher) across the VCC and GND lines of your WS2812B strip, as close to the strip’s input as possible. The capacitor smooths out power fluctuations and protects the LEDs from sudden current surges when first powered on.
- Resistor: Place a 220-470 Ohm resistor in series with the data line, between your microcontroller’s output pin and the strip’s DIN pin. This resistor helps to reduce noise on the data line and protects the data input of the first LED.
Power Injection for Longer Runs
Why is power injection necessary? For longer WS2812B LED strips (typically over 1-2 meters or 60 LEDs), the thin copper traces on the strip itself cannot carry enough current without a significant voltage drop. This drop leads to dimming and color shifts, especially at the end of the strip (blue LEDs are often the first to be affected).
How to do it: Connect additional power (VCC and GND) wires from your main 5V power supply to multiple points along the LED strip, usually every 30-60 LEDs. This ensures consistent voltage delivery throughout the entire length, maintaining uniform brightness and color accuracy.
Controlling Your Lights: Microcontrollers and Beyond
Once wired, it’s time to bring your WS2812B LED strip to life!
- Microcontrollers: Arduino and ESP32 are popular choices. You’ll typically use a library like FastLED or Adafruit NeoPixel, which simplifies the complex timing required to send data to the WS2812B chips. These libraries provide functions to set individual LED colors, control brightness, and create various effects.
- WLED Firmware: For ESP32 users, WLED is an open-source firmware that offers an incredibly user-friendly web interface and smartphone app. It comes pre-loaded with numerous animations and allows for easy customization without extensive coding.
- Dedicated Controllers: Standalone WS2812B controllers offer wireless control via smartphone apps (e.g., MagicHome, LEDENET) and often integrate with smart home assistants like Alexa or Google Assistant for voice control.
Troubleshooting Common WS2812B Issues
Even experienced DIYers encounter problems. Here are common issues and their solutions:
Flickering or Incorrect Colors
What’s going on? This often points to data signal integrity issues or insufficient power.
- Check Data Line: Ensure your data resistor is in place. Minimize the distance between the microcontroller and the first LED.
- Power Fluctuations: Verify your power supply can handle the current draw. The capacitor should help stabilize the power.
- Ground Connection: Double-check that all grounds (microcontroller, strip, power supply) are connected.
Entire Strip Not Lighting Up
No lights at all?
- Power Connection: Confirm VCC and GND are correctly connected and receiving power. Test your power supply voltage.
- Data Connection: Ensure the data line is connected to the correct microcontroller pin and the strip’s DIN.
- Code Issues: Double-check your code, library installation, and that
strip.show()(or equivalent) is called to update the LEDs. - Faulty LED: If the first LED is damaged, data won’t pass through. Try cutting off the first LED and re-connecting.
Dimming or Color Shift Towards the End
Lights fading out? This is a classic symptom of voltage drop.
- Power Injection: Implement power injection at regular intervals along your strip.
- Thicker Wires: Use thicker gauge wires for power distribution to minimize resistance.
Creative Applications: Unleash Your Imagination with WS2812B
The versatility of WS2812B LED strips makes them a favorite for an endless array of creative projects.
- Under-Cabinet Lighting: Create ambient kitchen lighting that can change mood with the flick of a button or a voice command.
- TV Bias Lighting: Reduce eye strain and enhance perceived contrast by placing strips behind your TV or monitor, synchronizing colors with on-screen content.
- Gaming Setups: Elevate your gaming experience with dynamic lighting effects that react to in-game events or audio.
- Artistic Installations: Design unique light sculptures, animated signs, or interactive art pieces.
- Holiday Decorations: Go beyond simple blinking lights with custom animations for any holiday, from festive Christmas patterns to spooky Halloween effects.
- Home Theaters: Immerse yourself fully with lighting synchronized to your movies or music.
“From a simple accent light to a complex interactive display, WS2812B strips provide a robust platform for makers to truly express their creativity in light,” explains Michael ‘Maker Mike’ Chen, a veteran electronics hobbyist and custom lighting designer. “The ability to control each pixel individually is a superpower for DIY enthusiasts.”
Maintaining Your WS2812B LED Strips for Longevity
To ensure your WS2812B LED strip projects stand the test of time, a little care goes a long way.
- Proper Power Management: Always use a sufficiently powerful and stable 5V power supply. Overloading or using an unstable supply can significantly shorten the lifespan of your LEDs. Ensure voltage protection elements like capacitors are in place.
- Environmental Protection: If using strips outdoors or in humid environments, ensure they have the correct IP rating and that all connections are sealed against moisture and dust.
- Gentle Handling: Avoid excessive bending, twisting, or stretching of the strip, especially at solder joints, as this can damage the internal circuitry or connections.
- Heat Dissipation: While LEDs are efficient, prolonged use at full brightness can generate heat. Ensure adequate airflow, especially for high-density strips, or consider mounting them on an aluminum channel to act as a heatsink.
Frequently Asked Questions
What is the difference between WS2812B and regular LED strips?
The key difference is individual addressability. Regular LED strips (e.g., analog RGB) control all LEDs on a segment to display the same color, whereas WS2812B strips allow you to control the color and brightness of each individual LED.
How many WS2812B LEDs can an Arduino/ESP32 control?
An Arduino Uno typically has limited memory and processing power, making it suitable for hundreds of LEDs. An ESP32, with its greater processing power and memory, can control thousands of WS2812B LEDs, making it ideal for larger, more complex projects.
Do I need a resistor for WS2812B?
Yes, it is highly recommended to add a 220-470 Ohm resistor in series with the data line (DIN) between your microcontroller and the WS2812B strip. This helps protect the first LED and improves data signal integrity.
What kind of power supply do I need for a WS2812B strip?
You need a regulated 5V DC power supply. To determine the amperage, multiply the number of LEDs by 0.06 Amps (60mA) for worst-case (all white) scenarios, or 0.02 Amps (20mA) for average use with varied colors and animations. Always round up to the next available power supply rating for safety.
Can WS2812B strips be cut?
Yes, WS2812B LED strips typically have marked cut points, often every LED or every few LEDs. You can cut them with scissors at these designated lines. Just ensure you only cut on the marked lines to avoid damaging the circuit.
Conclusion
The WS2812B LED strip is a truly remarkable component that has empowered countless DIY enthusiasts to craft stunning and personalized lighting experiences. From understanding its addressable magic to confidently wiring, powering, and programming it, you now have the foundational knowledge to embark on your own creative lighting journey. We at NamsP are passionate about providing the expertise and practical guidance you need to illuminate your world. So, grab your tools, let your imagination run wild, and discover the endless possibilities that WS2812B LED strips can bring to your next project!
Frequently Asked Questions
What is the difference between WS2812B and regular LED strips?
The key difference is individual addressability. Regular LED strips (e.g., analog RGB) control all LEDs on a segment to display the same color, whereas WS2812B strips allow you to control the color and brightness of each individual LED, offering 16.7 million colors per LED.
How many WS2812B LEDs can an Arduino or ESP32 control?
An Arduino Uno typically has limited memory and processing power, making it suitable for hundreds of LEDs. An ESP32, with its greater processing power and memory, can control thousands of WS2812B LEDs, making it ideal for larger, more complex projects requiring more than 500 LEDs.
Do I need a resistor for WS2812B LED strips?
Yes, it is highly recommended to add a 220-470 Ohm resistor in series with the data line (DIN) between your microcontroller and the WS2812B strip. This helps protect the first LED from current spikes and improves data signal integrity, preventing flickering.
What kind of power supply do I need for a WS2812B strip?
You need a regulated 5V DC power supply. To determine the amperage, multiply the number of LEDs by 0.06 Amps (60mA) for worst-case (all white) scenarios, or 0.02 Amps (20mA) for average use with varied colors and animations. Always round up to the next available power supply rating for safety and stability.
Can WS2812B LED strips be cut to custom lengths?
Yes, WS2812B LED strips typically have marked cut points, often every LED or every few LEDs. You can cut them with scissors at these designated lines. Ensure you only cut on the marked lines to avoid damaging the internal circuitry and maintain functionality.
Setting Up Your WS2812B LED Strip
This guide outlines the essential steps and components needed to safely wire and power your WS2812B LED strip for dynamic lighting projects.
Before starting, collect your WS2812B LED strip, a microcontroller (like Arduino Uno or ESP32), a 5V DC power supply, jumper wires, and a breadboard for prototyping. Crucially, acquire a 100-1000 u00b5F capacitor (6.3V or higher) and a 220-470 Ohm resistor for protection.
Identify the VCC (5V), GND, and DIN (Data In) pins on your strip. Connect the strip's VCC to the power supply's positive terminal and GND to its negative terminal. Ensure the microcontroller's GND is also connected to this common ground for reliable data communication. Finally, connect a digital output pin from your microcontroller to the strip's DIN pin.
Solder the 100-1000 u00b5F capacitor across the VCC and GND lines of your WS2812B strip, as close to the input as possible, to smooth power fluctuations. Place the 220-470 Ohm resistor in series with the data line, between your microcontroller and the strip's DIN pin, to reduce noise and protect the first LED.
For WS2812B LED strips longer than 1-2 meters or with more than 60 LEDs, connect additional power (VCC and GND) wires from your main 5V power supply to multiple points along the strip, typically every 30-60 LEDs. This prevents voltage drop, ensuring uniform brightness and accurate colors throughout the entire length.
Use a microcontroller like Arduino or ESP32 with libraries such as FastLED or Adafruit NeoPixel to program your WS2812B strip. These libraries simplify setting individual LED colors, controlling brightness, and creating various effects. Alternatively, for ESP32 users, WLED firmware offers a user-friendly web interface and smartphone app with pre-loaded animations.
Get our weekly buyer guide
Practical specs, not advice. Unsubscribe anytime.
These NeoPixel strips are fantastic for adding a pop of color to my gaming setup. The 16.7 million distinct colors per LED really shine through, and the effects are super smooth. My only minor gripe is that the adhesive on the back could be a bit stronger; I had to use some extra clips to keep them perfectly in place under my desk. Still, a great product overall.
I’ve been wanting to upgrade my home office lighting for ages, and the WS2812B strips were exactly what I needed. The individually addressable LEDs make such a difference; I can create custom scenes for different tasks. Setup was surprisingly straightforward, even for a beginner like me. Definitely recommend these for anyone looking for dynamic lighting.
I got these WS2812B strips for some accent lighting in my living room. While the concept of individually addressable lighting is cool, I found the initial programming a bit more complex than I anticipated. It took some time to get the exact effects I wanted, and the documentation wasn’t always super clear. They look good now, but be prepared for a learning curve if you’re new to this.
Absolutely love the compact 5050 surface-mount package of these LEDs. It makes them so versatile for various projects, from backlighting my TV to creating custom light art. The brightness is impressive, and the control over each individual LED is a game-changer. I’m already planning my next project with these!